Update (2026): This article covers Webpack 2, which is now ancient (Webpack is at v5.x). The global installation approach shown here is explicitly warned against in the official Webpack docs. Modern projects typically use Vite, which requires minimal configuration. If you do need Webpack, install it as a local devDependency.
If you’re feeling intimidated by Webpack, don’t worry; you’re not alone. Webpack is intimidating.
What exactly is a proxyTable, anyway? Why do we need so many files just to compile our code? Don’t worry—we’ll start from the very beginning.
Webpack is the next step in the evolution of front-end tooling. First, there was Grunt, then came Gulp, and now we have Webpack.
When you have a more complex and resource-heavy project, Webpack is definitely the way to go. For example, you might need to compile JavaScript, SCSS, import files, hot-reload without affecting the current state, bundle production builds, and more.
Webpack to the Rescue
If you want to become a well-rounded frontend engineer, knowing Webpack is essential. I’ll try to make this as easy as possible.
Let’s Get Started!
Things You’ll Need:
- Basic knowledge of Node.js
- NPM (Node Package Manager)
- Basic command line/terminal skills
- A text editor (any will do)
- A Unix-like operating system (Mac or Linux)
- Install Node.js
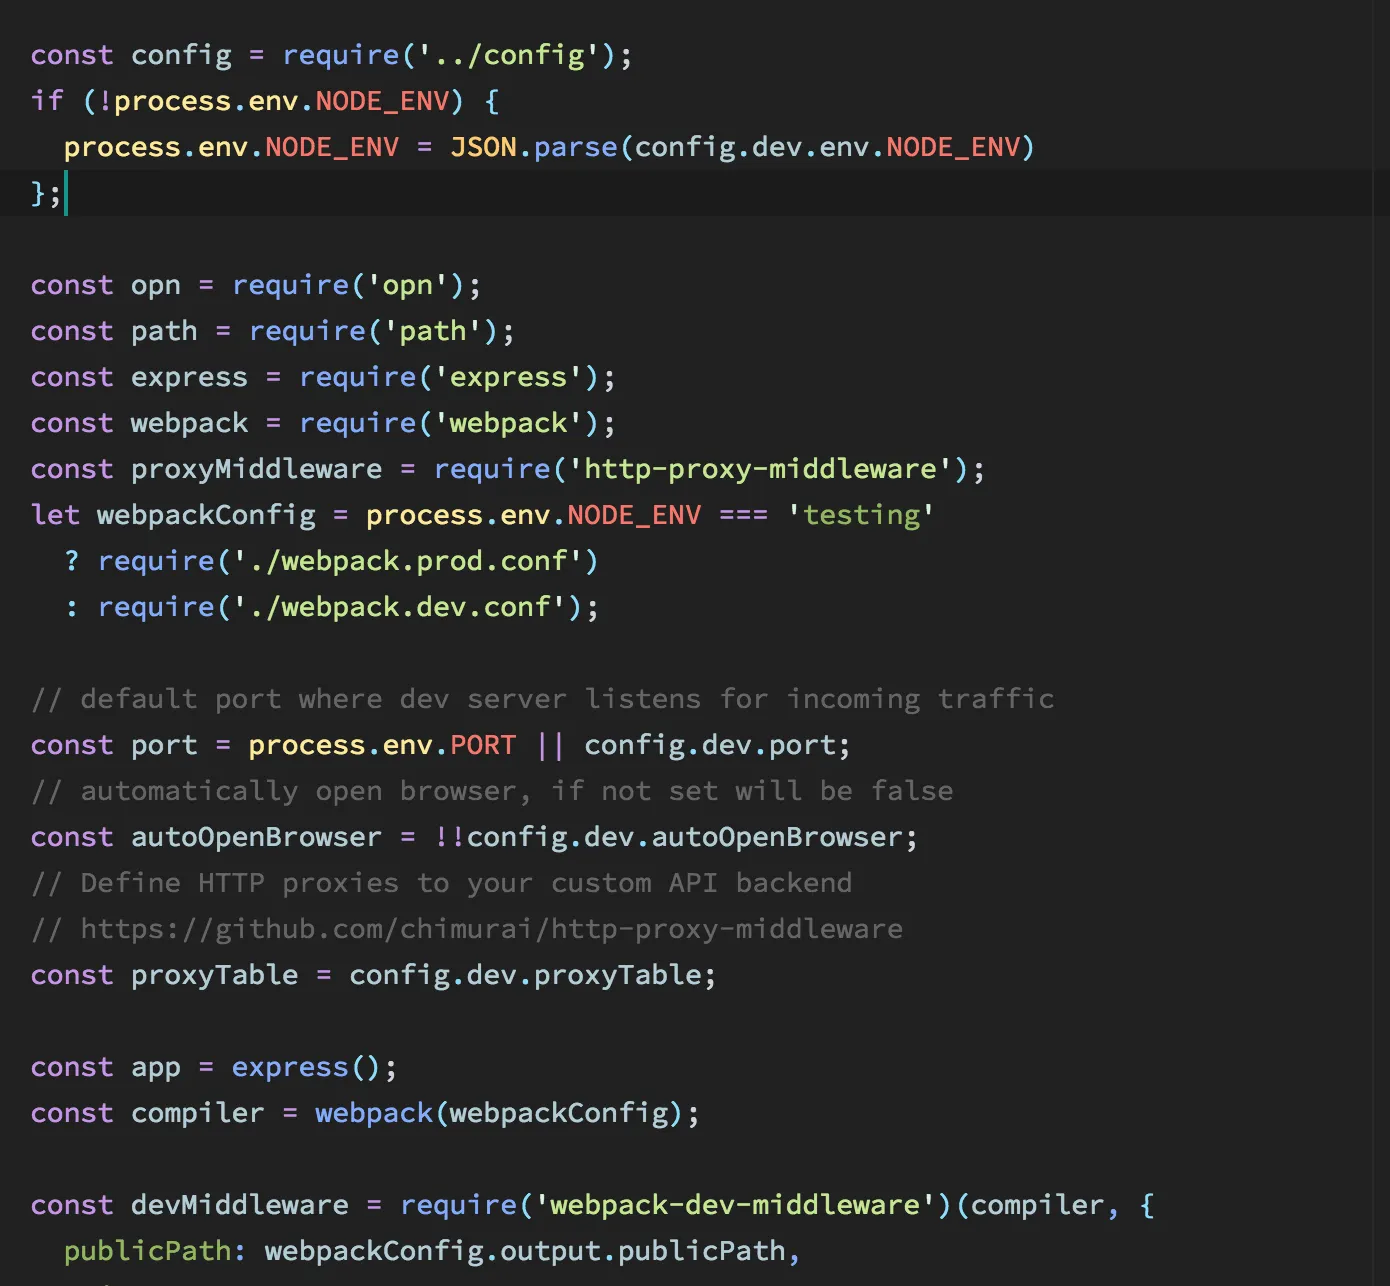
Setting Up Webpack
With Node.js and NPM installed, we’re ready to set up Webpack. Start by creating a new project folder and navigate to it in your terminal. Initialize a new Node.js project with:
npm init -yThis will create a package.json file, which is the basic configuration file for your project.
Now, let’s create the necessary files: index.html, webpack.config.js, and index.js. Your project structure should look something like this:
my-project/├── index.html├── webpack.config.js└── index.jsInstall Webpack Dependencies
We need to install Webpack and Webpack Dev Server, which will serve our files via HTTP.
npm install --save-dev webpack webpack-dev-serverConfiguring Webpack
Open webpack.config.js and start by requiring Webpack:
const path = require('path');
module.exports = { entry: './index.js', output: { filename: 'bundle.js', path: path.resolve(__dirname, 'dist'), }, mode: 'development',};This basic configuration tells Webpack where to find the entry file (index.js) and where to output the bundled file (bundle.js).
Connecting Webpack to HTML
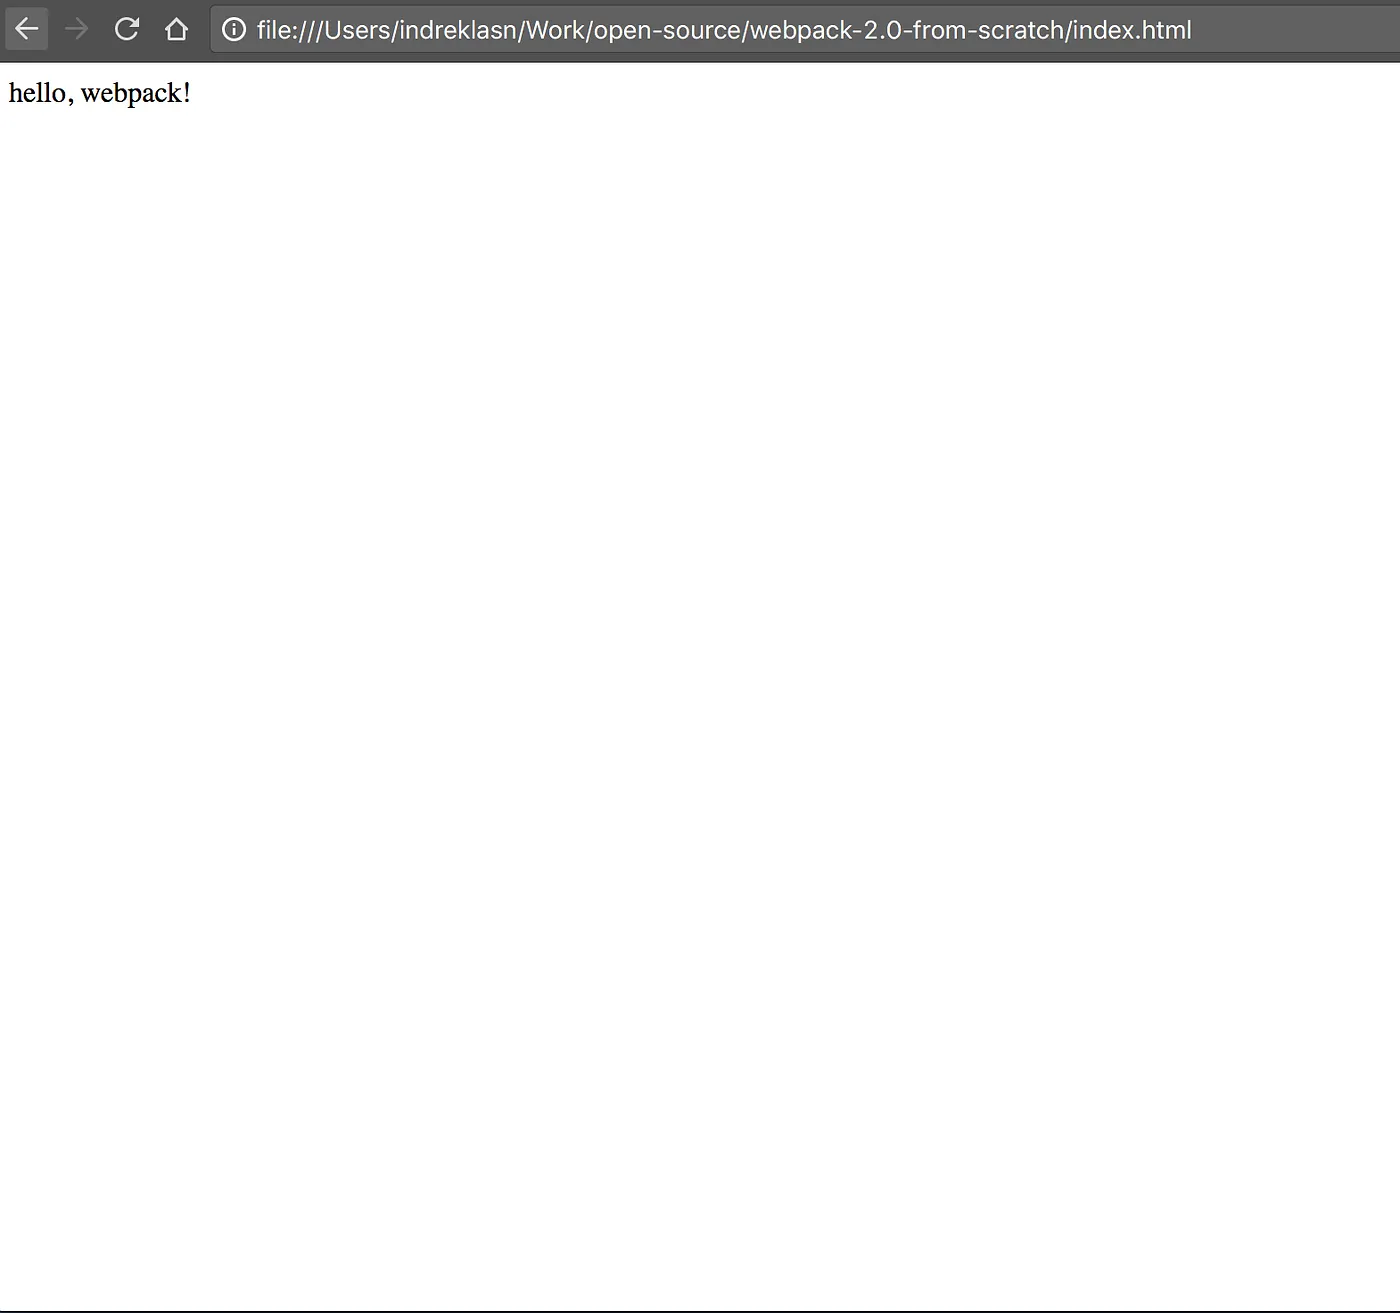
In index.html, include the bundled JavaScript file by adding a <script> tag:
<script src="bundle.js" />Running Webpack
Before you can run Webpack, install it globally:
npm install -g webpack webpack-cliNow, you can run Webpack with:
webpackWebpack will generate a bundle.js file in the dist directory. Open index.html in your browser, and you’ll see the result of your first Webpack project.
How Do We Watch for Changes?
Currently, we have to manually re-run the compile task every time we make a change. That’s tedious and time-consuming. Luckily, there’s an easy fix!
webpack --watchThis command will automatically recompile your project whenever changes are detected, saving you time and effort.